In HTML, a button is an interactive element that allows a user to interact with the web page. The user can submit a form, open or close a dialog, animate an element, and so on based on the action associated with the button click.
In HTML, every element has a default display type. These display types are block, inline-block, and inline. Each button has a default display type of inline-block.
Therefore, when you create a button, it only takes as much space as it needs. So, if there are multiple buttons in a single line, they by default sit very close to each other(depending on your browser).
In such situations, we have to explicitly give some space between the buttons for a better user experience. This article will guide you through different ways of giving space between two or more buttons.
Give Space using the Margin Property
The simplest and most commonly used approach to give space between two buttons in CSS is to use the margin property.
The margin property is used to create space around elements. It specifies the margin of all four sides(top, right, bottom & left) of the element in various CSS units such as px, em, rem, etc.
As we want to give only horizontal space between the buttons, therefore, we will use only the margin-left and margin-right properties.
The margin-left property specifies the margin of the left side, whereas, the margin-right property specifies the margin of the right side of the element.
So, if you want to give space between two buttons using margin, you have three options. First, apply only margin-right on the first button, second, apply only margin-left on the second button, and third, apply margin-right on the first button and margin-left on the second button.
Let’s say we have two buttons in our HTML file, button1 & button2:
<button class="btn1">Button 1</button>
<button class="btn2">Button 2</button>
we want to give a space of 20px between these two buttons.
So, we can apply a margin-right of 20px on the first button. This will push the second button 20px away from it.
/*Give a right margin of 20px*/
.btn1{
   margin-right: 20px;
}
A similar 20px space we can also create by applying a margin-left of 20px on the second button. This will push the first button 20px away from it.
/*Give a left margin of 20px*/
.btn2{
   margin-left: 20px;
}
The third approach could be to split the 20px space between the margin-left and the margin-right. That is, apply 10px margin-right on the first button and 10px margin-left on the second button. This will push both buttons 20px away from each other.
/*Give a right margin of 10px*/
.btn1{
   margin-right: 10px;
}

/*Give a left margin of 10px*/
.btn2{
   margin-left: 10px;
}
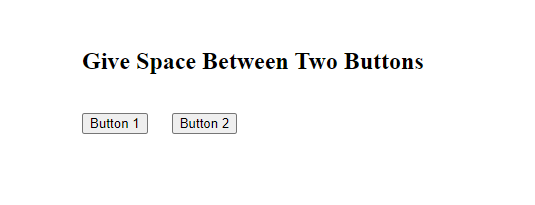
All three approaches would create a space of 20px between the two buttons.
After running the above code, it will produce the following output:
You can also run the above example in our live Html editor by clicking the try it now button and start practicing there.
Example:
.btn1{
   margin-right: 20px;
}
Give Space Using HTML’s nbsp Entity
This method is generally used when we want to give a very small amount of space between two elements. In this method, we use HTML’s entity.
The stands for non-breaking space. A non-breaking space is a space that does not break onto a new line even if enough space is not available.
The creates a blank space equal to a space character and you can use any number of between elements.
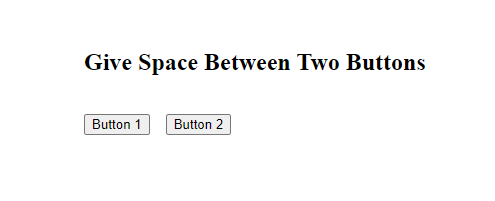
The following example will create a non-breaking space same as three space characters between the button1 & button2 as we have used three
<button>Button 1</button> <button>Button 2</button>
Sample output after running the above code:
Give Space Between Multiple Buttons using CSS Flexbox
If there are multiple buttons in a single line and you want to give space between them, you can either set the margin for each button individually, or you can use CSS flexbox.
CSS flexbox is a flexible layout module that lets you design responsive layouts without using float or positioning.
Let’s say we have three buttons in our HTML document. We want to give 20px space between these buttons using the flexbox module.
For that, we have to first put these buttons inside a parent div element.
<div class="flex-container">
    <button>Button 1</button>
    <button>Button 2</button>
    <button>Button 3</button>
</div>
Now, to make this div flexible, set its display property to flex. The display: flex; will make the parent div a flex container and all its children (buttons) will start behaving as flex children.
Now, to set a gap between the buttons, use the column-gap property. The column-gap property sets the specified gap between all flex children.
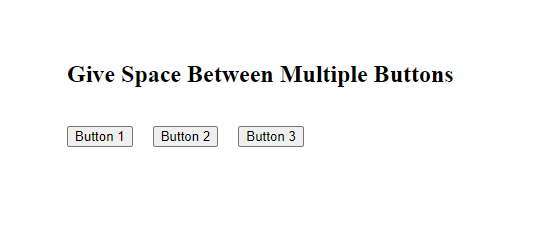
In our case, we have to set the column-gap property to 20px, as we want a gap of 20px among all buttons.
.flex-container{
    display: flex;
    column-gap: 20px;  /* Set a gap of 20px */
    align-items: flex-start;
}
Below is the outcome of the above code:
Conclusion
In this article, we learned three different ways to give space between two or more buttons using CSS.
The first approach is to use the margin-left or the margin-right property. The margin-left property sets the margin of the left side while the margin-right property sets the margin of the right side of the element.
The second approach is to use the entity. The sets a non-breaking space of one space character. It is only used when we want to give a small amount of space.
The third approach is to use the column-gap property of the flexible module to set the gap between two or more buttons.